Overclocking is the process of changing the default clock speed of a computer’s component (CPU, RAM..) into a higher one in order to get a better performance in the PC equipped with it. It’s a very common thing do among gamers. It can be sometimes dangerous on the computer if you adjust the clock speeds too high, and it may physically damage your computer, but if you know what you are doing, you’ll get a better performance in most cases without breaking the red line.
There’s more to it than just changing the clock speeds of CPU and RAM: You can also for example change the maximum temperature a CPU can reach before it drops the performance down in order to save the physical condition of the CPU, or the maximum/minimum amounts of virtual RAM (VRAM) or the power (Watts, mA, V) that’s being supplied to various components in your computer. If you do those things correctly, you’ll get a better performance on your computer.
In order to do that on an AMD Ryzen Mobile CPU, you’ll need a special program for the task. Here comes Ryzen Controller, which is a relatively new graphical program that works on both Windows and Linux that allows you to adjust various settings related to many components in your computer. We’ll learn together how to install it on Linux.
Table of Contents:
Installing Ryzen Controller on Linux

Installing RyzenAdj
Ryzen Controller depends on a special command line utility called RyzenAdj, which is actually the main core program responsible for overclocking/adjusting the power settings of your PC’s components. You’ll need to compile RyzenAdj from source on your Linux distribution before you proceed further.
Don’t be scared: The compilation process is quite easy and quick. On Debian/Ubuntu based distributions, you’ll need to run the following command to install some build dependencies:
sudo apt-get install libpci-dev cmake gcc git
On Fedora:
sudo dnf install libpciaccess-devel git
For other distributions, just make sure that the development package related to libpci is installed.
Now, we can go ahead and compile our RyzenAdj:
git clone https://github.com/FlyGoat/RyzenAdj
cd RyzenAdj
mkdir build && cd build
cmake ..
make
If the build process was completed successfully, you should see both the ryzenadj and libryzenadj.so files under RyzenAdj/build/ folder. Just keep them there for now.
Installing Ryzen Controller
Now we can go ahead with installing Ryzen Controller. Just head to the releases page of the program and download the latest package corresponding to your distribution’s package format and install it.
On Debian-based distros, it would be:
sudo dpkg -i <path_to_downloaded_deb_file>
On Fedora-based distributions, it would be:
sudo rpm -ivh <path_to_downloaded_rpm_file>
From my testing, it seems that there’s a bug preventing from launching the program from the application menu. So in order to start the program, you’ll have to write the following command in the terminal:
sudo ryzencontroller --no-sandbox
Tweaking the Settings
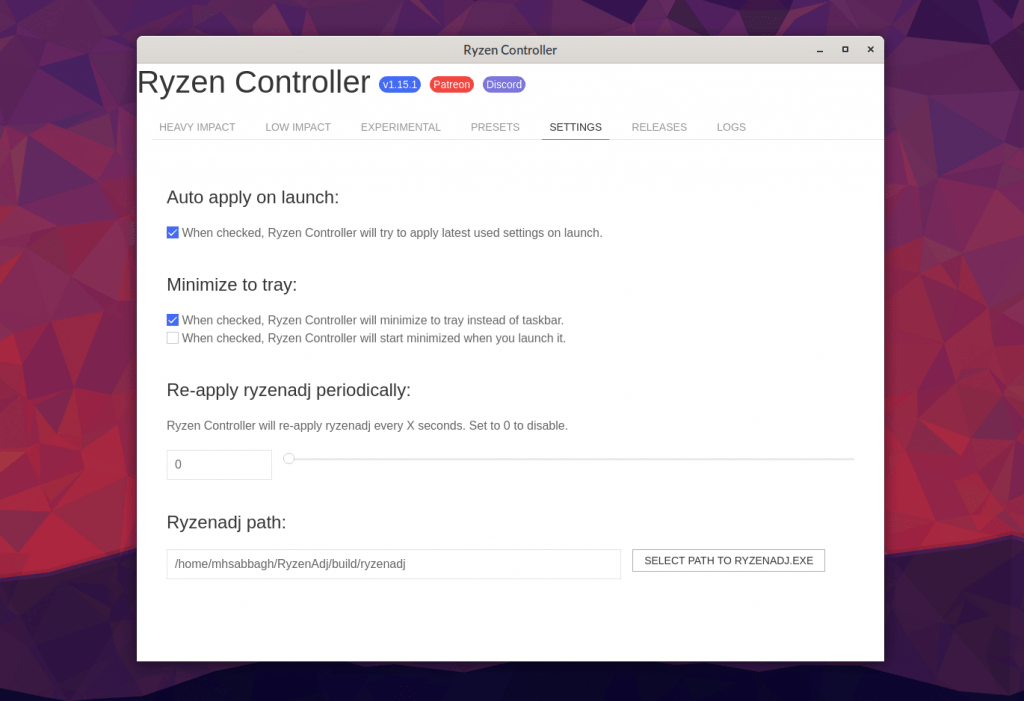
After you installed the program, you now need to tell it the full path to the previous ryzenadj binary that we built in a previous step. Just head to the Settings tab, and under RyzenAdj Path, choose the path of the ryzenadj file:

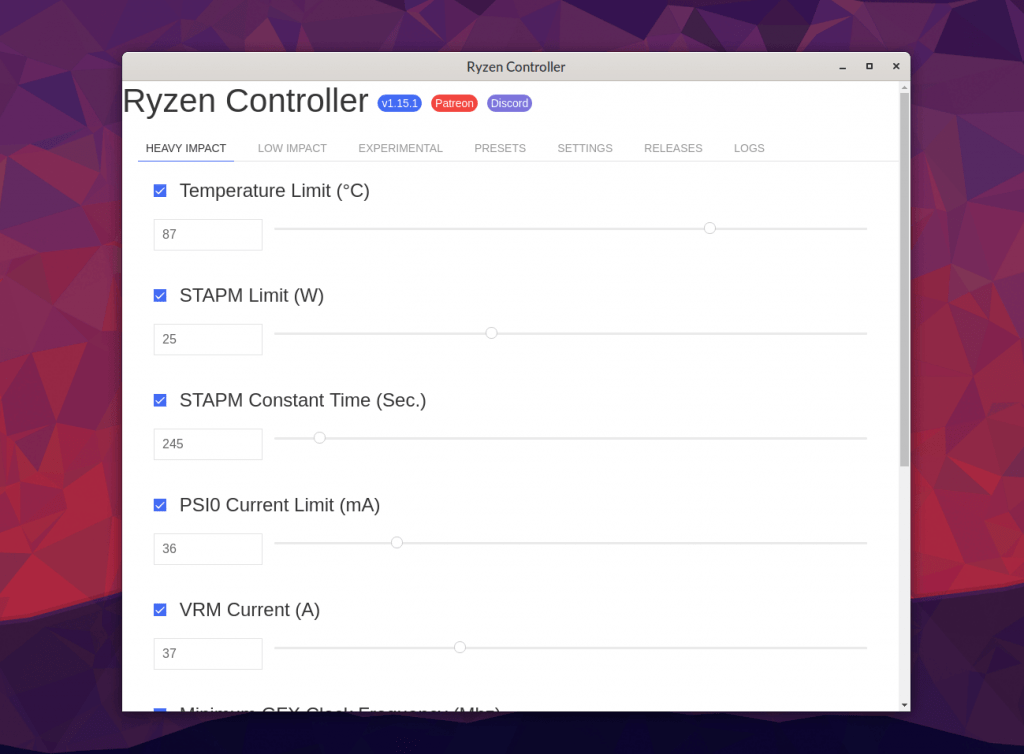
And that’s it! You can now start changing the settings of your components (clock speeds, power supply, temperature.. etc) from the other tabs that are available. Just hit “Apply” after each modification you do:

Conclusion
We’ve seen so far how to install and configure Ryzen Controller to tweak the settings of various components in our AMD-powered machine. Officially, there’s no AMD tool that works on Linux to allow you to do the same task; “Ryzen Master” (Which is the official program from AMD to overclock the desktop-series AMD processors) only works on Windows, so you’ll have to stick to these 3rd-party solutions till things start to change.
You may also want to check whether you can overclock the RAM/CPU clocks from the BIOS of your machine (Most of them do).
With a B.Sc and M.Sc in Computer Science & Engineering, Hanny brings more than a decade of experience with Linux and open-source software. He has developed Linux distributions, desktop programs, web applications and much more. All of which attracted tens of thousands of users over many years. He additionally maintains other open-source related platforms to promote it in his local communities.
Hanny is the founder of FOSS Post.


