If were about to make the switch to the Linux world from Windows, then there are some steps that you need to take on your computer before that. Those steps usually do not take much time and effort, and are just small switches that you need to turn off before you can install a Linux distribution on your PC.
What we’re gonna see in today’s guide is:
- How to disable Windows Fastboot technology.
- How to disable secure boot in your BIOS/UEFI and switch to legacy.
- How to burn the Linux distribution’s ISO image to your USB stick from Windows.
Let’s go over each one of them.
Table of Contents:
How to Disable Fastboot in Windows
For those of you who don’t know, Windows Fastboot or Windows Fast Startup is an option that is enabled by default in most Windows installations to simply not shutdown the machine when the user requests so, instead, it will be put in hibernation mode so that the next boot is extremely fast comparing to actually shutting down the PC and starting it again.
Microsoft enables this option by default for most users so that they don’t have to wait a long time before starting their new PC session, and so that they think their PC is actually fast as some sort of delusion.
Our issue is not with that, however. Our issue with Windows Fast Startup is that it will prevent you from reaching the boot menu which is required to boot from your USB stick. Because now since your PC is not really turned off then when you turn it on back again it will start from inside Windows without passing your BIOS boot menu, and we need to disable that so that we can boot Linux from our USB stick.
Doing that in Windows is luckily quite simple.
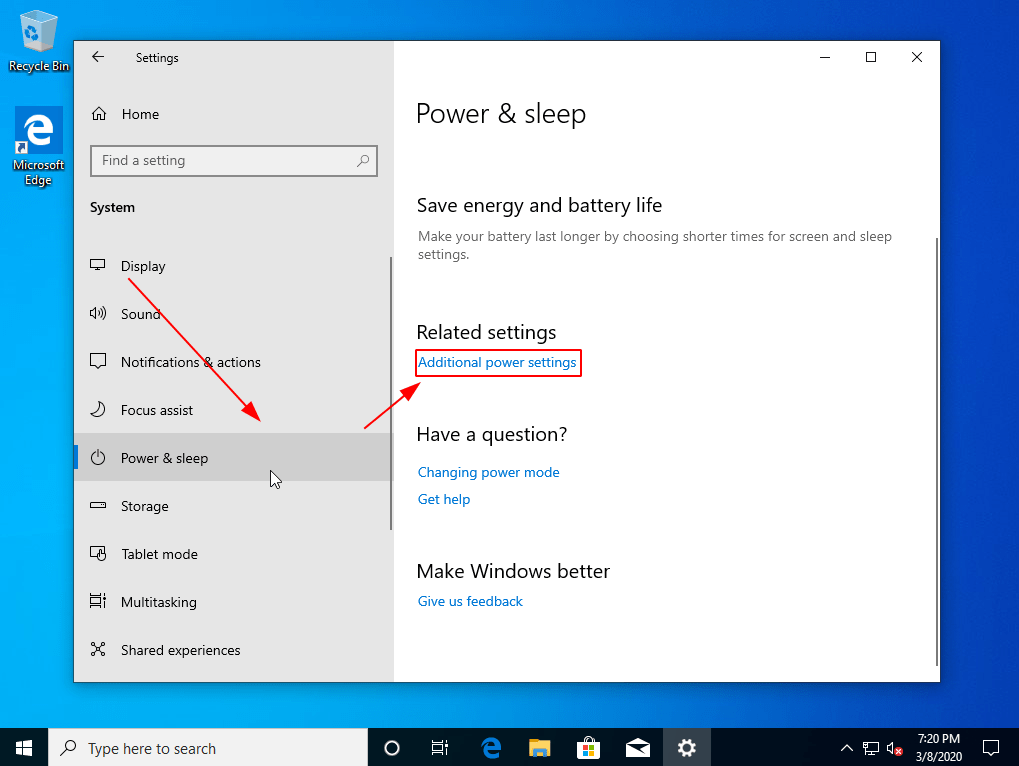
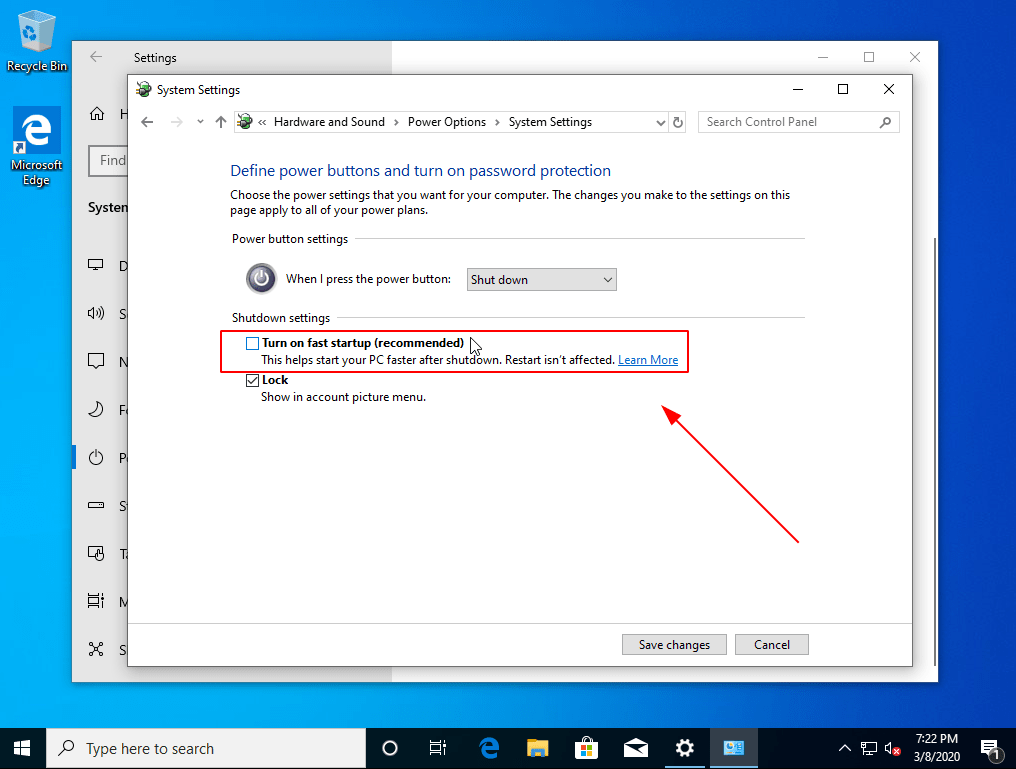
First, open your system settings and head to Power & Sleep, then click on Additional Power Settings:
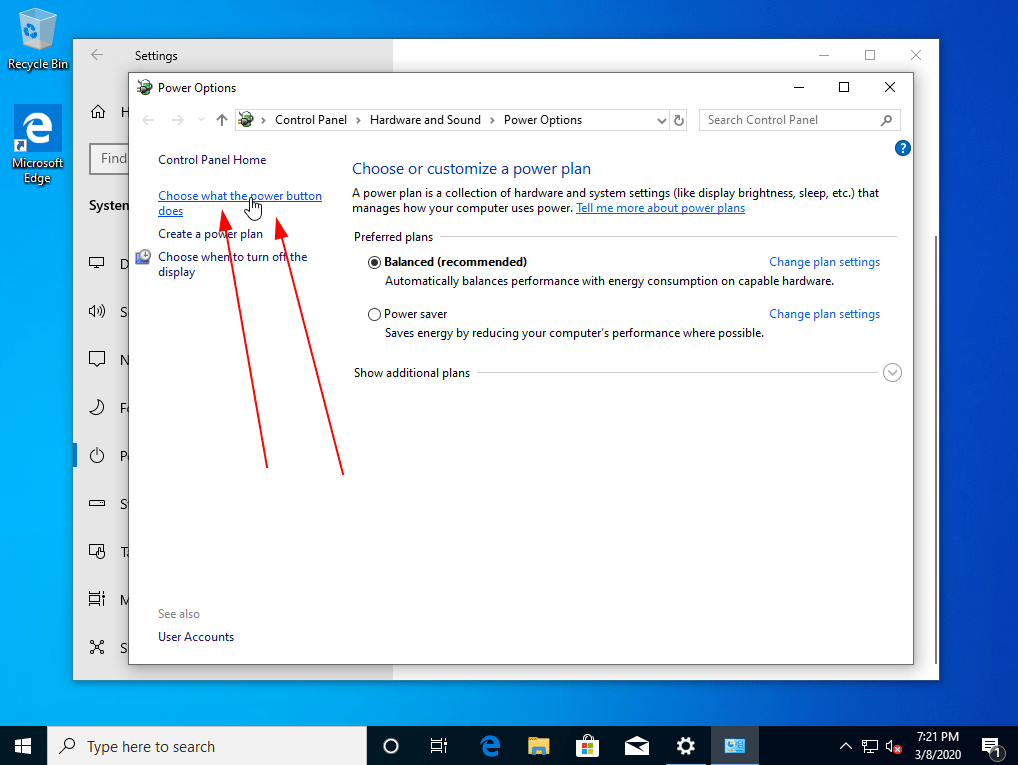
Click on the Choose what the power button do link:
And enable administrative permissions by click this:
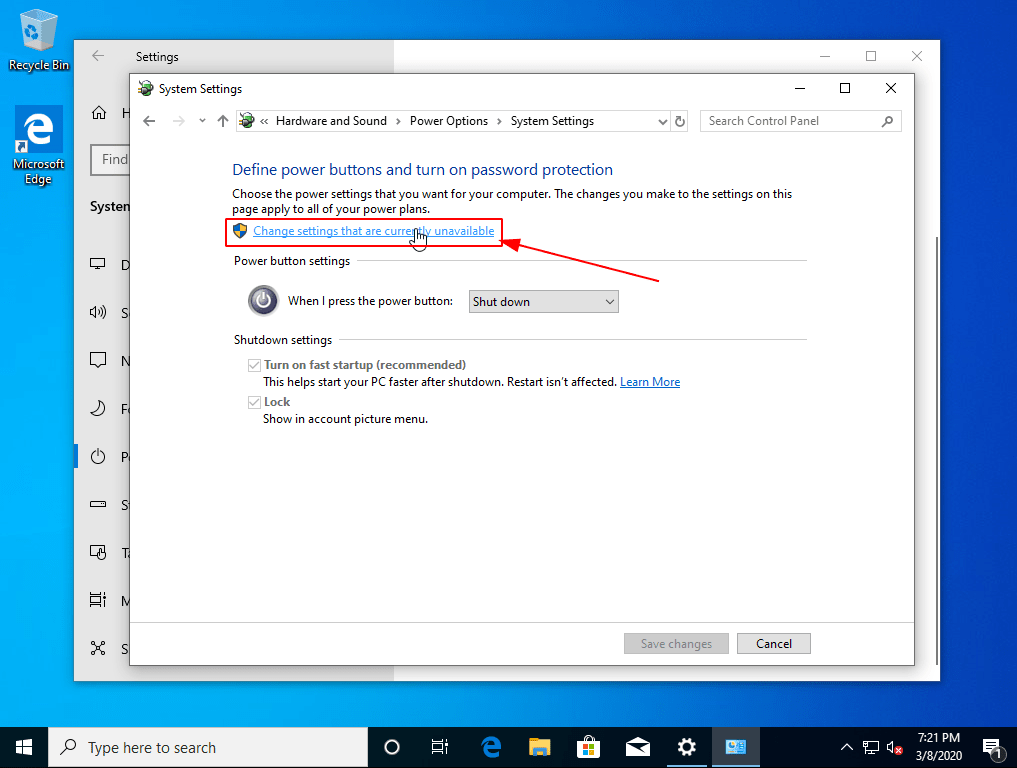
And finally remove the checkbox from near the Fast Startup option:
How to Disable (Strict) Secure Boot
What is secure boot?
Secure boot is a new technology that was introduced on most of the new PCs and laptops to prevent booting any operating system that does not contain a certificate and a key to make sure that this system is authorized. In other words, operating systems bootloaders will need to have a verified certificate that they are authentic from the side of your BIOS/UEFI software.
Secure boot is a new technology that was introduced on most of the new PCs and laptops to prevent booting any operating system that does not contain a certificate and a key to make sure that this system is authorized. In other words, operating systems boot-loaders will need to have a verified certificate that they are authentic from the side of your BIOS/UEFI software. The ones that don’t won’t be able to boot on your machine.
While most Linux distributions can boot just fine in secure boot, a lot of them are not. And the main issue is that each one of the hardware vendors handles secure boot in a totally different way then the others.
So in order to prevent spending countless hours on why your USB stick is refusing to boot, and many other issues, the simplest solution currently is to disable secure boot (or at least switch it on the mode that allows booting other OSes) and switch to the legacy boot mode.
How to disable Secure boot on your computer?
Doing that is quite simple, just after you power up your PC, hit F9 or F12 or DELETE keys (Depending on your machine) so that you gain access to the BIOS/UEFI software on your computer.
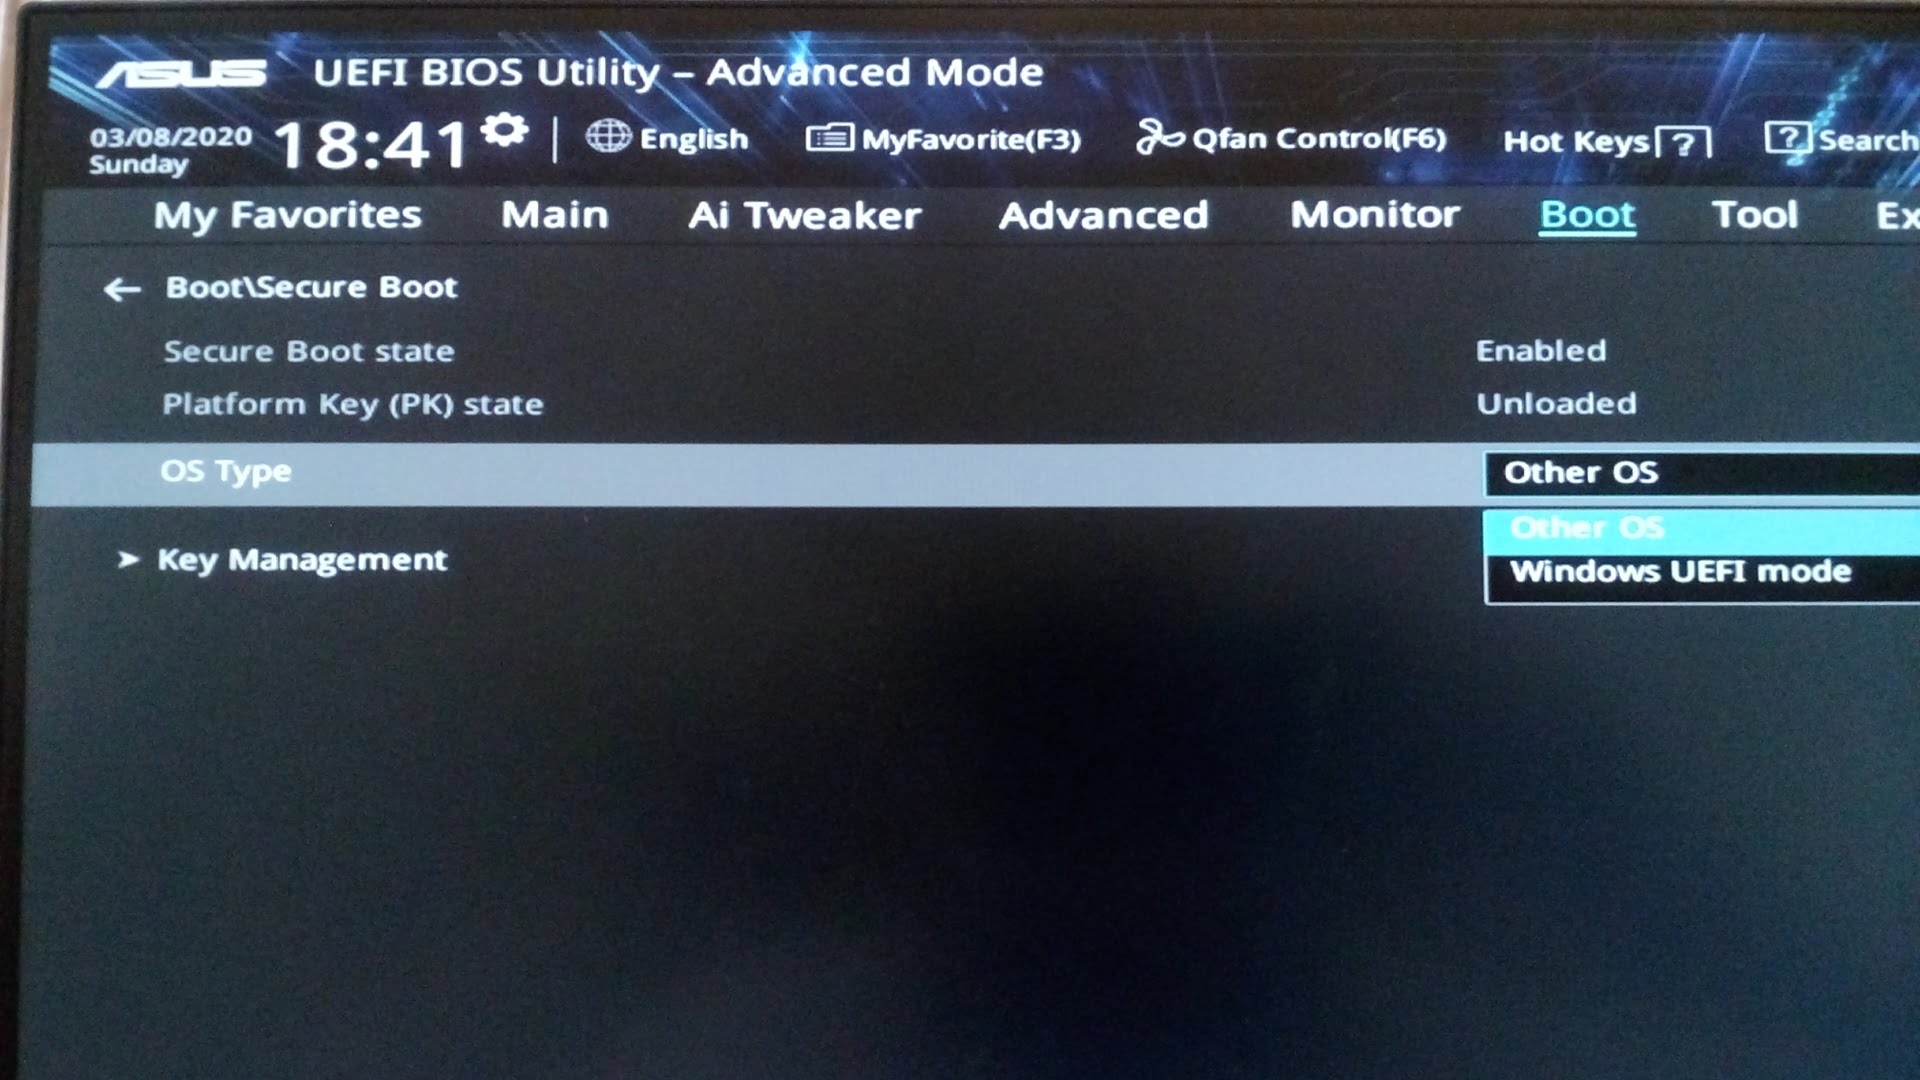
After that, search for something like “Enable secure boot” in the boot options, and either switch it to the “Other OSes” mode like in this UEFI setup:
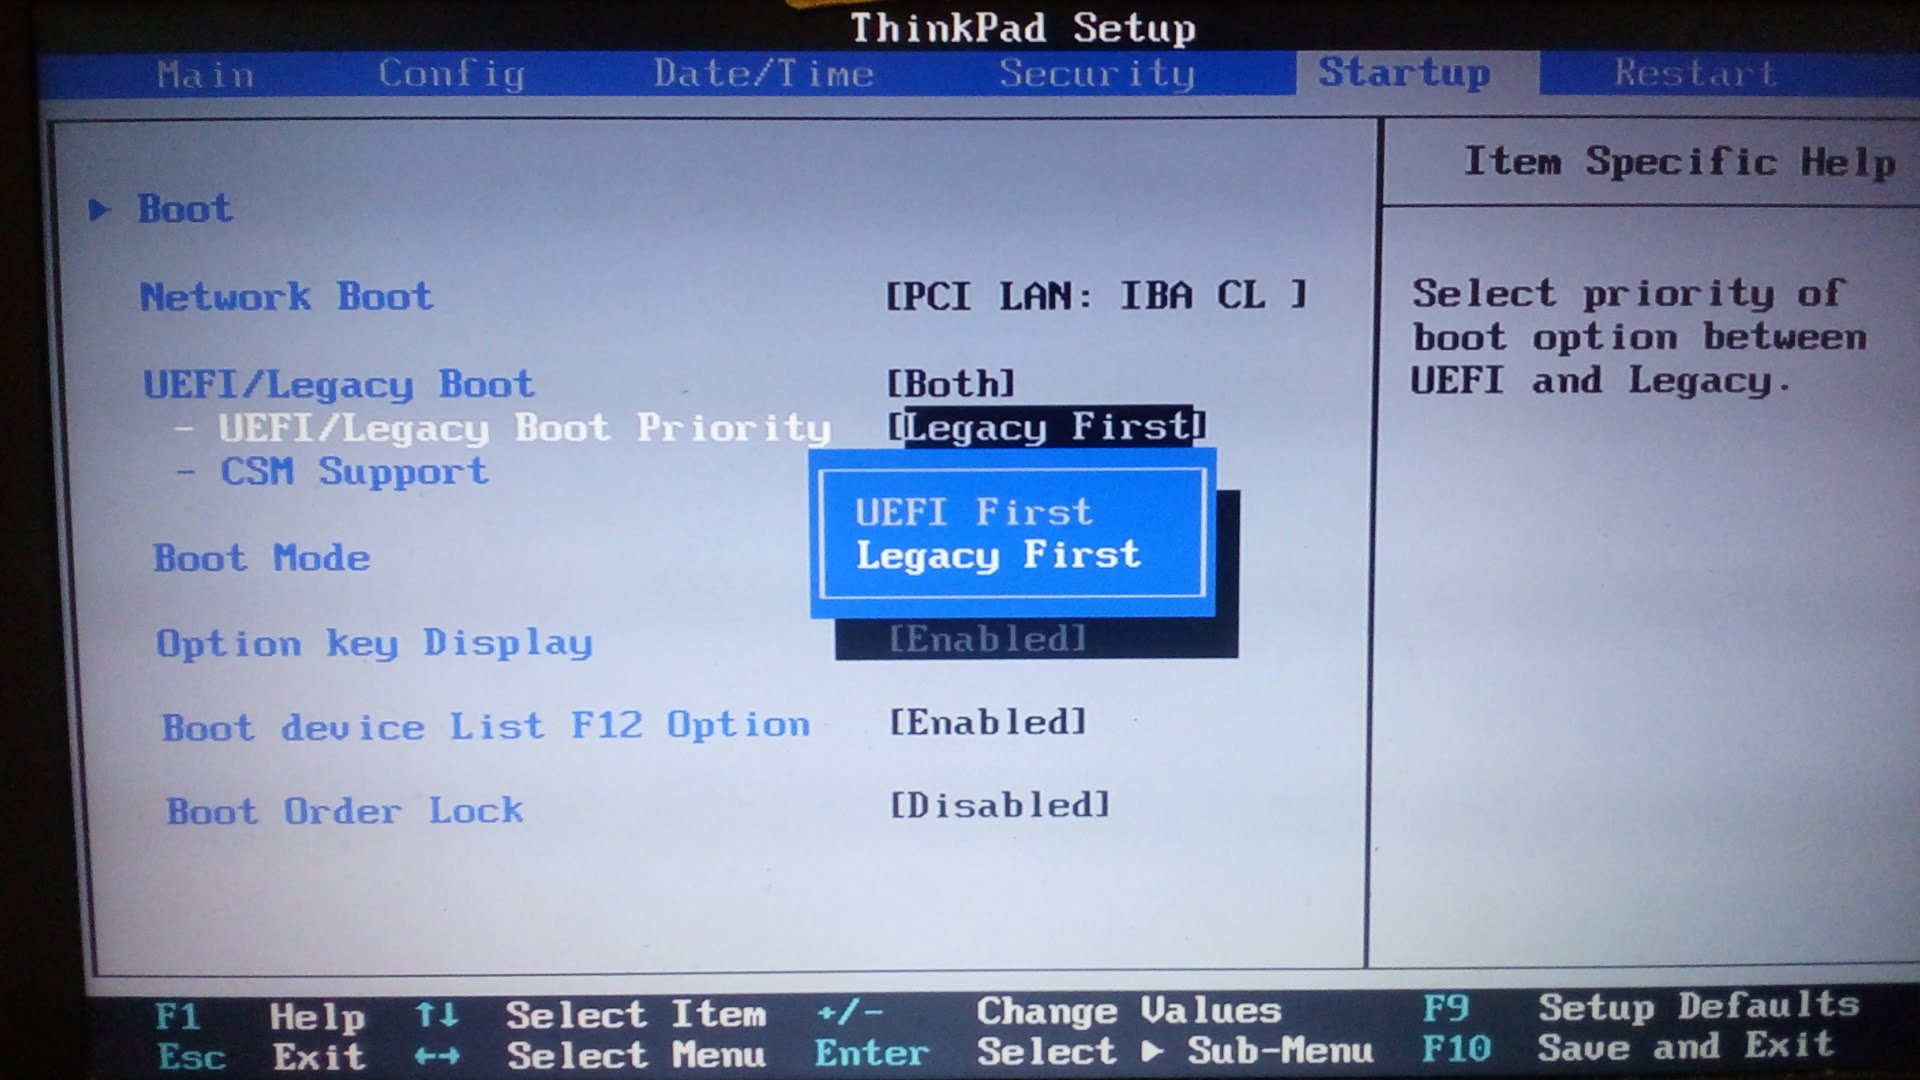
Or completely switch to the legacy mode like this in Thinkpad BIOS setup:
And restart, that’s it!
How to Burn the Distribution’s ISO Image File to your USB Stick
The last step is getting a good ISO images burner on your Windows installation so that you can burn them to your USB stick. The best program right now for this is Rufus, which is a graphical free and open source ISO burner for USB sticks.
Simply download Rufus from its official website, and install it.
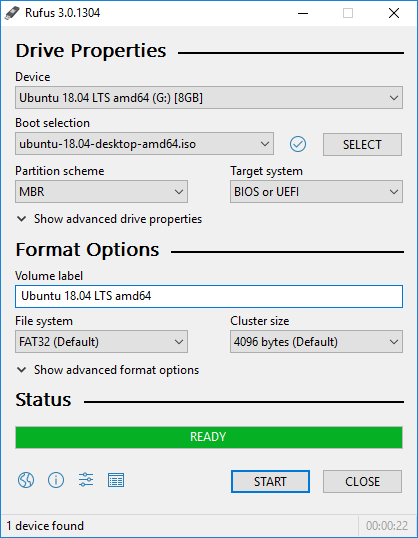
And then after you have downloaded the ISO image of the Linux distribution you want to use, simply use it like the following (Just select the ISO image and the USB stick, and let it do the rest):
Booting Up From the USB Stick
Now you are ready for the big moment!
Plug in your USB stick to your PC and reboot your system, and press F1 or F2 or F9 or F12 or DELETE keys (Depending on your BIOS/UEFI system) in order to display the boot menu like the following:
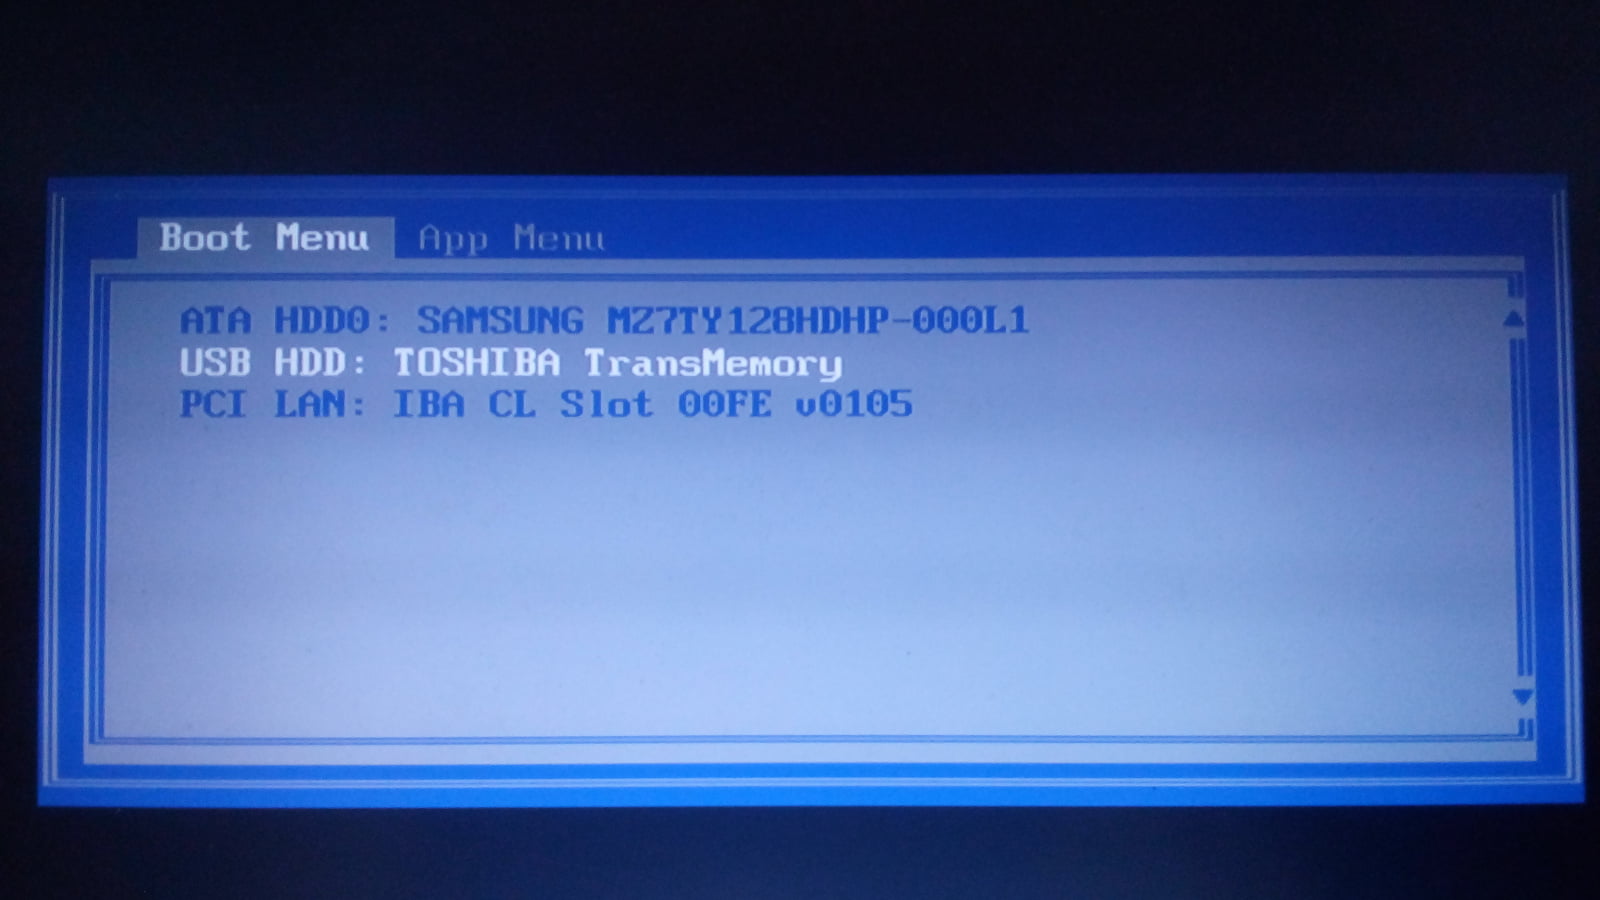
Choose the USB stick, and your Linux OS will boot:
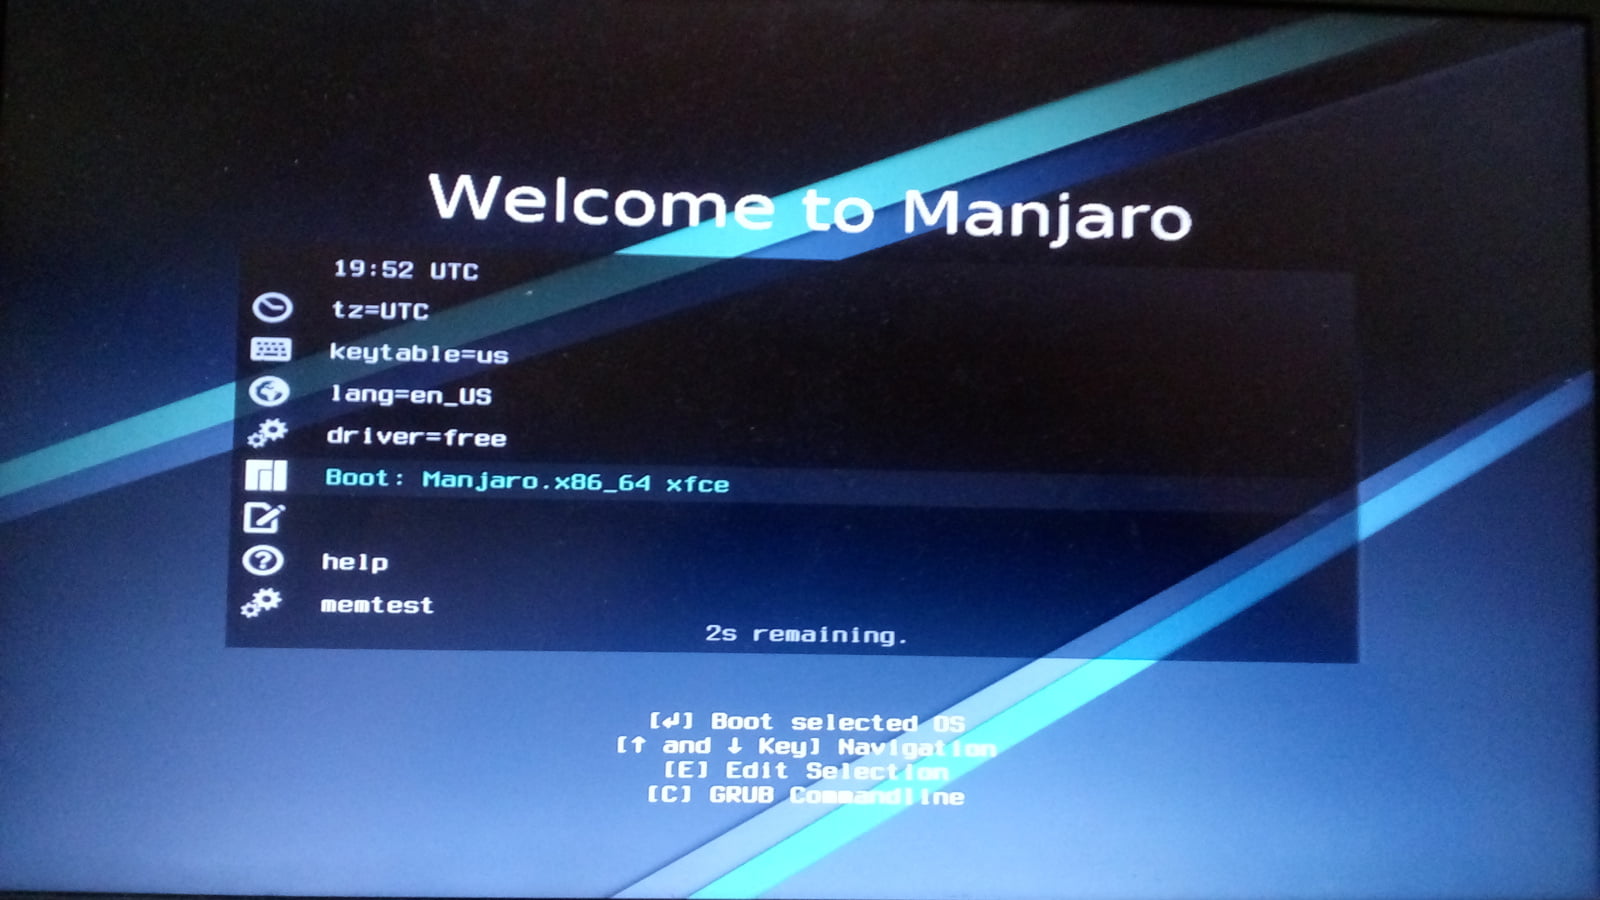
Congratulations! You are now ready to install Linux on your PC and continue your journey in the Linux world.
FOSS Post is a high-quality online magazine about Linux and open source software. With a team of professional writers from all over the world, we bring you the latest articles, analysis and reviews related to open source.
Articles published with this account are written as a collaborative effort between writers. You can email us at contact@fosspost.org
