Many governments around the world block access to VPN services so that their citizens don’t bypass their censorship. Most of the time they can’t block access entirely, but they can make it harder by blocking access to the main website of the VPN service, or the VPN servers which belong to it.
In Turkiye for example, access to NordVPN is blocked; you can’t access the main website, nor you can even download the software from their Linux repositories, because their CDN domain is also blocked.
Thus, in such situations, you have to use workarounds in order to connect to the VPN service.
We will explain in this article how you can bypass government censorship on NordVPN on Linux, so that you can use the VPN service once again.
Bypassing VPN Government Censorship on Linux
Step 1: First of all make sure you have have the needed software installed with the following command (on Ubuntu):
sudo apt install strongswan-charon
Step 2: Get your NordVPN service credentials (username and password) from the official website at https://my.nordaccount.com/dashboard/nordvpn/. if you can’t access the page (because it’s blocked), then you will have to use the Tor browser to access it and retrieve your credentials:
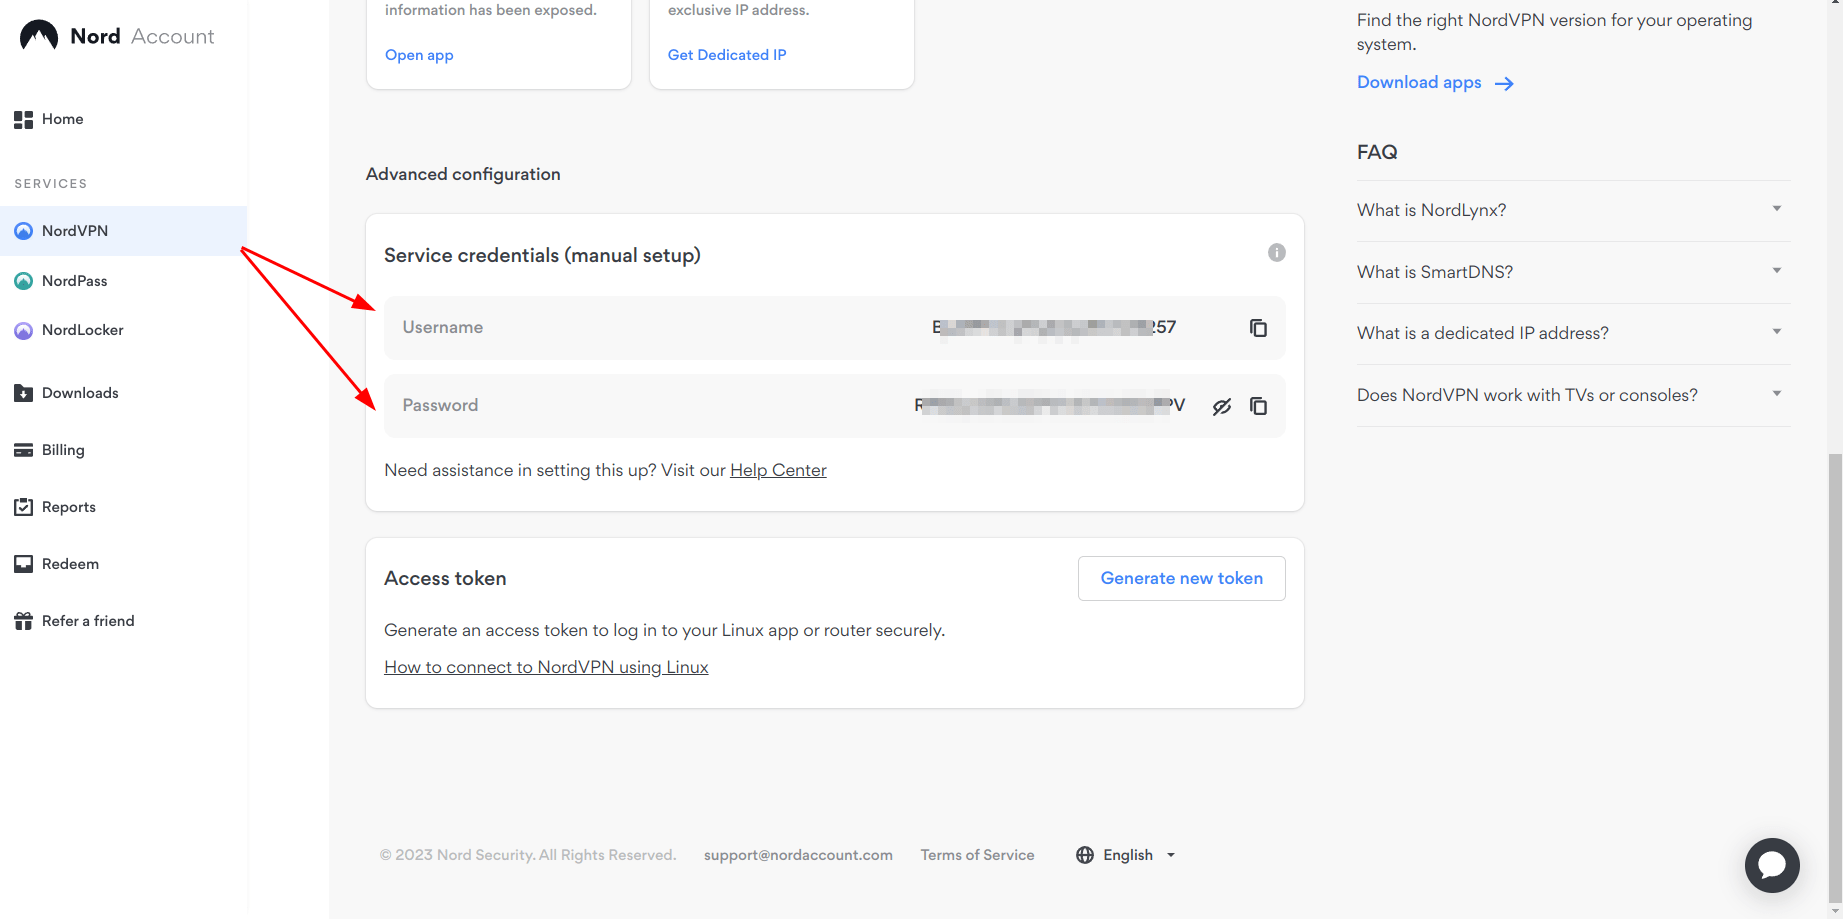
Step 3: Run the following command:
sudo nano /etc/ipsec.secrets
Add this content inside the file:
Username : EAP "your password"
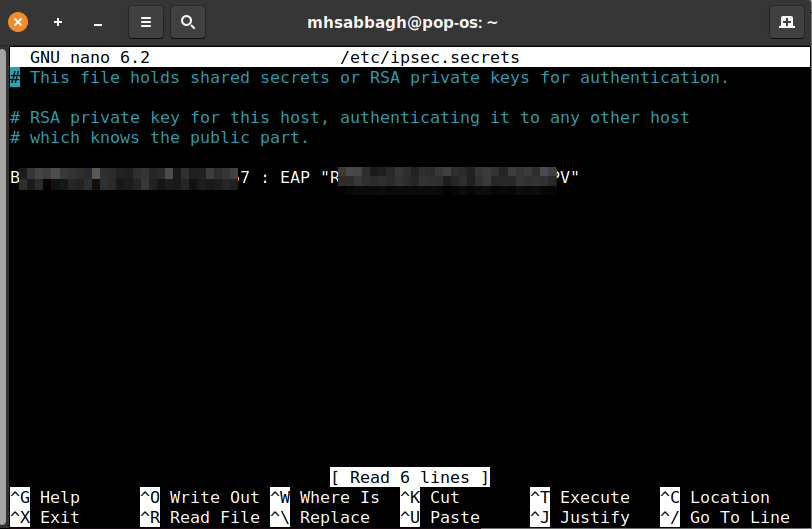
And replace Username with the service username that belongs to you, and your password with your service password. Make sure the content of the file looks like this picture below (pay attention to the spaces and quotation marks):
Step 4: Open this file with this command:
sudo nano /etc/ipsec.conf
And add the following content:
conn nord
    keyexchange=ikev2
    dpdaction=clear
    dpddelay=300s
    eap_identity="SERVICE_USERNAME"
    leftauth=eap-mschapv2
    left=%defaultroute
    leftsourceip=%config
    right=NORD_SERVER_HOSTNAME
    rightauth=pubkey
    rightsubnet=0.0.0.0/0
    rightid=NORD_SERVER_HOSTNAME
    rightca="C = PA, O = NordVPN, CN = NordVPN Root CA"
    type=tunnel
    auto=add
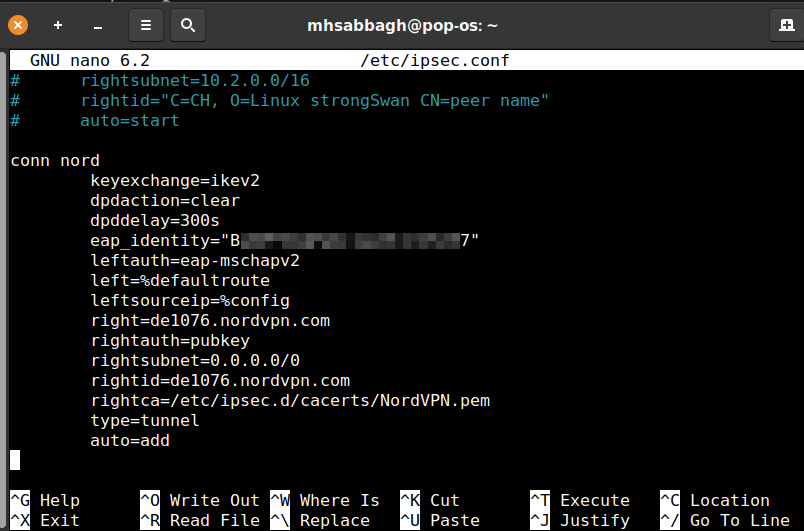
Replace SERVICE_USERNAME with your service username from the previous step. You also need to replace the two occurances of NORD_SERVER_HOSTNAME with any NordVPN server that you can get from the following page: https://nordvpn.com/servers/tools/. For example, de1076.nordvpn.com (or any server such as ro74.nordvpn.com, us9327.nordvpn.com… etc).
The contents you added to the end of the file should look like this:
Step 5: Run the following command to refresh the configuration files for ipsec:
sudo ipsec restart
Step 6: You also need to change your DNS used on your system to a new one such as Cloudflare DNS (or any other). You can do this by editing /etc/resolv.conf file:
sudo nano /etc/resolv.conf
And removing everything inside it, and adding the following contents:
nameserver 1.1.1.1
nameserver 1.0.0.1
Step 7: In order to make these changes permanent, you need to prevent your system components from changing the DNS servers at /etc/resolv.conf file again. To do that, run:
sudo chattr +i /etc/resolv.conf
If you get the following error:
chattr: Operation not supported while reading flags on /etc/resolv.conf
Then run this command instead:
sudo chattr +i /run/systemd/resolve/stub-resolv.conf
Step 8: Now, you are ready to start your VPN connection. Simply run the following command to start it:
sudo ipsec up nord
And to check if things are working, head to https://whatismyipaddress.com/ and see if your IP address changed or not. It should change and you should succeed in connecting to the VPN server you chose in step 4.
Now, it’s true that this setup works for the time being but it may not work sometimes in the future; either because NordVPN took down the VPN server you were using for maintenance or because the government blocked access to it.
The folks at NordVPN are continuously updating their servers list and creating new ones in order to allow users to connect to them, but you need the official nordvpn Linux client installed in order to get all of this automated for you instead of depending on the manual ipsec method.
The ipsec method was just temporary used so that we can install NordVPN client on Linux. (otherwise we wouldn’t have been able to, because access to nordcdn.com is blocked so you can’t download the client from the official website).
Step 9: While you are still connected to NordVPN using the ipsec method, run the following command to install NordVPN client on Linux:
sh <(wget -qO - https://downloads.nordcdn.com/apps/linux/install.sh)
Step 10: Run the following command to login to your NordVPN account from the Linux client:
nordvpn login
It should ask you for your username and password (normal ones, not the service ones!). Just enter them and you will be redirected back to the terminal and the login process should succeed.
Step 11: Now turn off your ipsec connection with:
sudo ipsec down nord
And connect normally using NordVPN Linux client with the following command:
nordvpn connect germany
And you should become connected.
This method is better than just using ipsec all the time; because the server you have configured in /etc/ipsec.conf may be taken down or become no longer available, which would result in losing access to your VPN connection. But using the official client is better because it is always updated with all available NordVPN servers automatically for you.
You can now read our other guide on adjusting NordVPN settings on Linux for further options and tweaks that you apply:
Hope this helps!
With a B.Sc and M.Sc in Computer Science & Engineering, Hanny brings more than a decade of experience with Linux and open-source software. He has developed Linux distributions, desktop programs, web applications and much more. All of which attracted tens of thousands of users over many years. He additionally maintains other open-source related platforms to promote it in his local communities.
Hanny is the founder of FOSS Post.


